Dreaming of transforming your garden in 2025? Imagine a space that offers extra storage, a creative hobby zone, or even a stylish retreat. With the growing trend of DIY outdoor projects, more Irish homeowners are turning to kit garden sheds for practical and aesthetic solutions.
These sheds stand out for their convenience, affordability, and wide range of customization options compared to traditional builds. The right kit can instantly boost your garden’s organization, add value, and enhance its beauty.
This comprehensive guide will walk you through everything you need to know about kit garden sheds—from choosing the right type and material to planning, purchasing, assembly, and maintenance—so you can confidently create your perfect outdoor space.
Understanding Kit Garden Sheds: Types, Materials & Key Features
Dreaming of a practical, stylish, and flexible addition to your outdoor space? Kit garden sheds offer a modern solution for Irish homeowners seeking convenience and value in 2025. This section explores what sets kit garden sheds apart, the variety available, material choices, and the essential features you should prioritize.
What is a Kit Garden Shed?
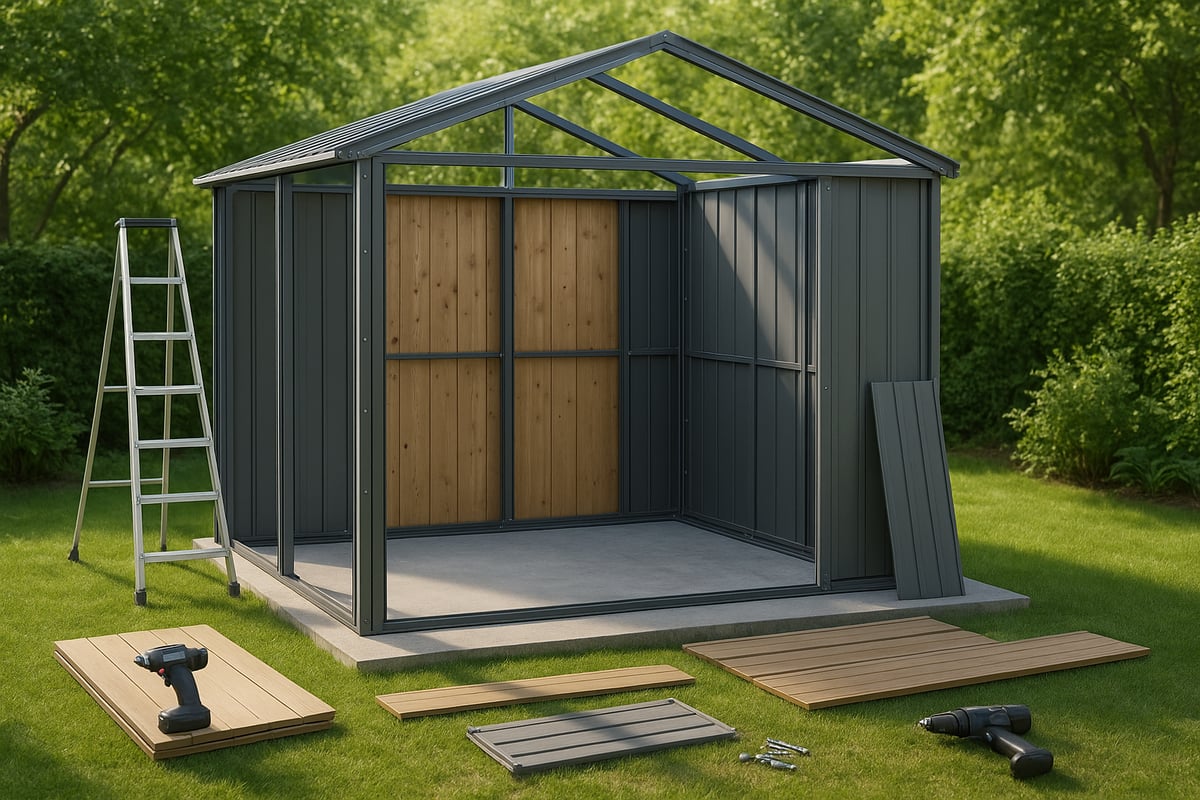
A kit garden shed is a prefabricated structure supplied as a set of parts ready for self-assembly. Unlike custom-built or fully pre-assembled sheds, kit garden sheds arrive flat-packed, making them easier to transport and store before construction.
Typical components include wall panels, roof sections, doors, windows, fixings, and a detailed instruction manual. The modular design allows homeowners to assemble the shed themselves, saving on labour costs and enabling personal customization.
DIYers and homeowners prefer kit garden sheds for their affordability, simplified logistics, and the satisfaction of building a tailored outdoor structure. With clear instructions and pre-cut materials, these kits make shed ownership accessible to a wider audience.
Popular Kit Shed Types & Styles
Kit garden sheds come in a wide range of shapes and sizes, ensuring a solution for every garden and use case. The most common styles include:
- Apex: Traditional pitched roof for maximum headroom.
- Pent: Single sloped roof, ideal for placing against walls.
- Lean-to: Space-saving design, perfect for tight spots.
- Corner: Fits neatly into unused corners, maximizing garden space.
- Contemporary: Sleek lines and modern finishes for a stylish statement.
Size options range from compact units for tool storage to expansive workshops or garden offices. Many homeowners use kit garden sheds for gardening tools, bikes, potting, or as creative workspaces. In 2025, trending designs feature larger windows, integrated skylights, and eco-friendly finishes, reflecting the desire for light-filled, multipurpose spaces.
Whatever your needs, kit garden sheds provide versatile solutions that adapt as your lifestyle evolves.
Materials: Pros, Cons, and Lifespan
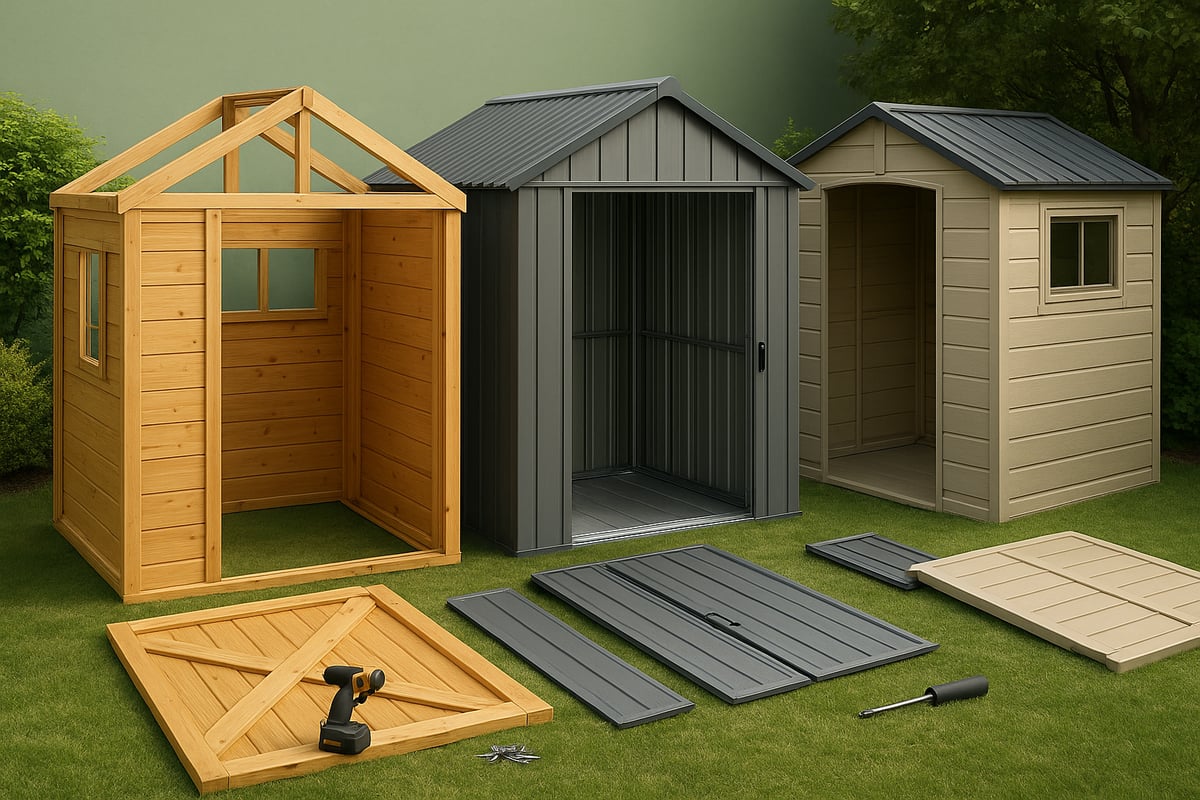
Material choice is crucial for durability, maintenance, and appearance. The three main options for kit garden sheds are timber, steel, and vinyl/plastic. Each offers distinct advantages:
| Material | Pros | Cons | Typical Lifespan | Maintenance Level |
|---|---|---|---|---|
| Timber | Natural look, insulates well | Needs regular treatment | 15–25 years | Moderate |
| Steel | Highly durable, secure | Can rust if untreated | 20–30 years | Low–Moderate |
| Vinyl/Plastic | Weatherproof, low upkeep | Less traditional appearance | 15–20 years | Low |
Timber kit garden sheds are prized for their classic charm and insulation, but require periodic staining or painting. For more details on timber options, see the Wooden garden sheds guide.
Steel sheds excel in security and longevity, with modern coatings minimizing rust. Vinyl and plastic sheds stand out for weather resistance and minimal maintenance, offering a range of colors to suit different tastes.
Sustainability is increasingly important, with many manufacturers offering responsibly sourced timber and recycled plastic components. Choosing eco-conscious materials helps reduce environmental impact while extending the shed's life.
Essential Features to Look For
When evaluating kit garden sheds, consider these key features to enhance comfort, security, and usability:
- Roof Types: Apex or pent, depending on space and style.
- Ventilation: Vents or windows to prevent condensation and mold.
- Insulation: Especially important for sheds used as offices or workshops.
- Security: Quality locks and reinforced panels deter theft.
- Flooring: Options include timber, metal, or raised plastic bases for weatherproofing.
- Natural Light: Windows and skylights improve usability and ambiance.
- Customization: Look for add-on compatibility like shelving, tool racks, and guttering.
Selecting the right combination of features ensures your kit garden sheds deliver value, protection, and enjoyment for years to come.
Planning Your Shed Project: Regulations, Siting & Preparation
Transforming your outdoor space with kit garden sheds begins long before the first panel is assembled. Proper planning ensures your investment is safe, compliant, and perfectly suited to your needs. This section will guide you through Irish regulations, optimal siting, site preparation, sizing, and budgeting, so your kit garden sheds project starts on solid ground.
Local Regulations and Permissions
Before assembling kit garden sheds, understanding Irish planning laws is crucial. Sheds are generally exempt from planning permission if they stay within size and height limits, are placed behind the house, and do not reduce your garden below 25 square meters.
However, exceptions exist. If your shed will be used for business, living, or exceeds limits, you must seek permission. Always check with your local authority to avoid issues. Common mistakes include building too close to boundaries or exceeding height restrictions, which can result in fines or mandatory removal.
For in-depth details on exemptions and applications, consult the Planning Permission for Garden Sheds in Ireland guide.
Choosing the Right Location
Selecting the best site for kit garden sheds impacts longevity and usability. Prioritize areas with good sunlight, which discourages damp and mold. Avoid low-lying spots where water may collect, as these can lead to rot or structural issues.
Consider access for moving lawnmowers, bikes, or tools in and out. Maintain distance from boundaries to comply with regulations and allow for future maintenance. Orient your shed so doors open easily and natural light enters, making the space more inviting.
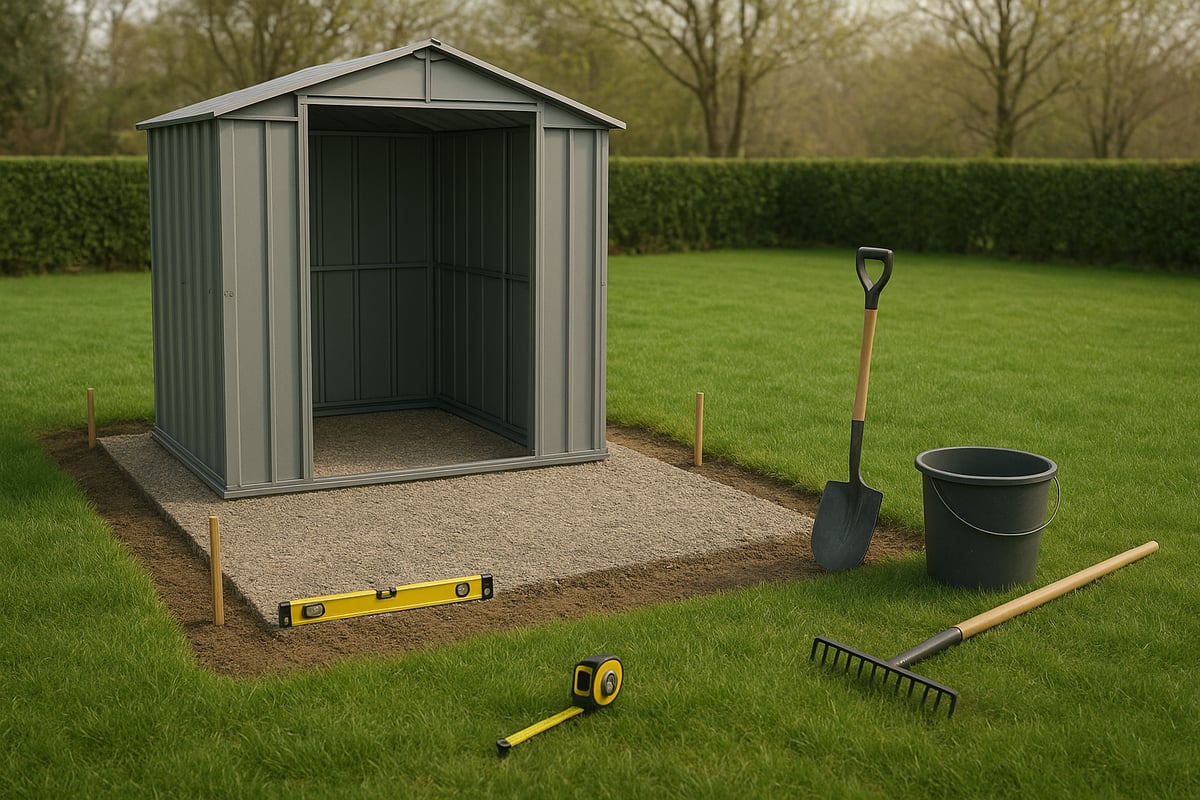
Site Preparation Steps
Proper groundwork is essential for kit garden sheds. Start by clearing vegetation and debris from your chosen spot. Use a spirit level to ensure the area is flat, preventing future warping or misalignment.
Next, lay a suitable foundation. Options include concrete slabs, paving slabs, or pressure-treated timber bearers. Good drainage is vital, so slope the base slightly away from the shed. This prevents water pooling and extends the life of your structure.
Refer to trusted supplier advice for best practices, and always double-check measurements before proceeding.
Sizing and Functionality Assessment
Accurately sizing kit garden sheds avoids frustration later on. First, list everything you plan to store or do in the shed. Will it house only tools, or do you need workspace for hobbies? Allow extra space for future needs or upgrades.
Sketch a simple layout to optimize storage and movement. For instance, position shelves up high for seasonal items, and keep daily-use tools within easy reach. Learning from real-life examples helps—many Irish homeowners use their sheds for both storage and creative pursuits.
Budgeting: Costs Beyond the Kit
When budgeting for kit garden sheds, consider more than just the upfront price. Typical kits range from €600 to €3,000 in 2025. Additional costs include delivery, foundation materials, insulation, and required permits.
Factor in accessories like shelving, security locks, or windows. To save money, compare suppliers, look for bundled deals, and handle simple tasks like site clearing yourself.
With careful planning, your kit garden sheds project will enhance your garden for years to come.
Step-by-Step: Buying the Right Kit Garden Shed
Choosing from the wide selection of kit garden sheds can feel overwhelming, but a step-by-step approach will simplify your decision. By focusing on essential criteria, evaluating purchase options, preparing for delivery, and selecting a trusted supplier, you can make your investment with confidence.
Researching and Comparing Kits
Start your search by identifying the key differences among kit garden sheds available in Ireland. Consider the size you need, the material (timber, steel, or vinyl), and the intended use—storage, workshop, or garden office. Look for reputable brands that offer robust warranties and have a solid track record with Irish customers.
Customer reviews and ratings provide valuable insight into real-world performance and assembly experiences. Comparing models side by side helps you spot quality kits, as well as those that cut corners. If you are interested in low-maintenance options, you might want to explore plastic sheds in Ireland to see how vinyl kits compare. Always check what is included in the kit, such as floors, windows, and security features.
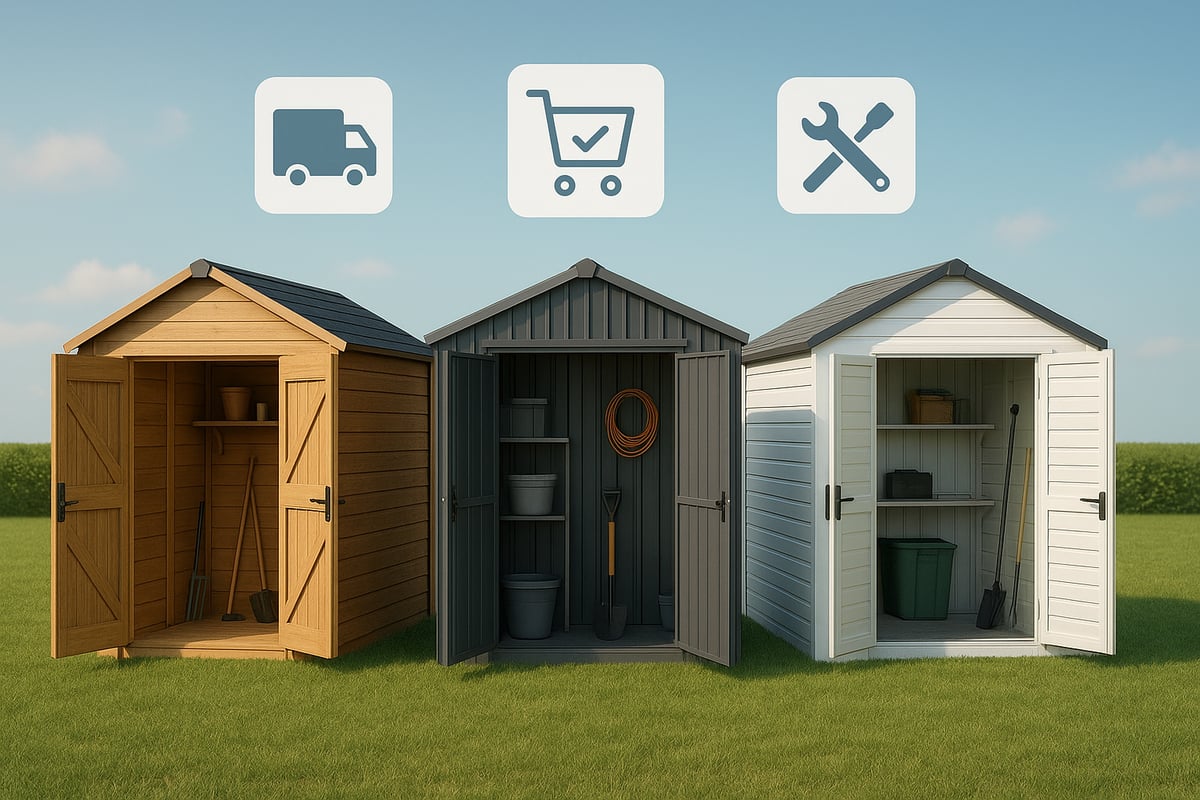
Where to Buy: Online vs. In-Store
When purchasing kit garden sheds, you have the option to shop online or visit local stores. Online retailers often have a broader selection and offer the convenience of home delivery, as well as helpful comparison tools. Many sites provide detailed product descriptions, customer photos, and live chat support.
Buying locally allows you to see kits in person, ask questions, and get expert advice tailored to your garden space. Some Irish suppliers offer appointment-based viewings or on-site consultations. Always review return policies, warranty terms, and after-sales support before making a decision. Local retailers may also provide exclusive models or package deals.
Delivery, Storage, and Pre-Assembly Checks
Once you have chosen your kit garden sheds, it is important to prepare for a smooth delivery and assembly process. Most suppliers will schedule a delivery window and provide clear instructions for receiving your kit. Upon arrival, store the components in a dry, secure area to prevent damage or warping, especially if you cannot assemble it immediately.
Before starting assembly, check every part against the inventory list and read through the manual thoroughly. Missing or damaged items should be reported promptly to the supplier. Organize panels, fasteners, and accessories for easy access. This preparation step helps avoid delays and ensures your kit garden sheds project stays on track.
Coola Living Ireland: Your Local Shed Kit Experts
For Irish homeowners seeking quality kit garden sheds, Coola Living Ireland stands out as a trusted supplier. Their range includes steel, timber, and vinyl kits designed for the Irish climate, with options suitable for any garden size or style. Unique benefits include free floor kits with most models, fast nationwide delivery, and expert advice from a family-owned business with over 30 years of experience.
Customers can arrange appointments to view sheds or collect their order directly from the Naas, Co Kildare location. Coola Living Ireland’s hands-on service and local knowledge make them a reliable partner for your next kit garden sheds project.
Assembly Guide: Building Your Kit Garden Shed
Building kit garden sheds is a rewarding project that can transform your outdoor space. With the right approach, anyone can assemble a sturdy, attractive structure that fits their needs. This section walks you through each stage of the assembly process, so you can confidently turn your kit into a finished shed.
Tools & Safety Essentials
Before you start building kit garden sheds, gather all necessary tools and safety gear. Essential tools include a cordless drill, screwdrivers, spirit level, measuring tape, adjustable wrench, and a sturdy ladder. For most kit garden sheds, a rubber mallet, utility knife, and PPE such as gloves, goggles, and sturdy footwear are also recommended.
Safety should always come first. Make sure your workspace is clear, dry, and well-lit. If you are working with heavy panels or roofing, ask a friend or family member to assist. Always follow the manufacturer’s safety instructions and never rush the process. For larger or more complex kit garden sheds, consider hiring a professional to help with assembly, especially for tasks involving electricity or structural changes.
Step 1: Unpacking and Organizing Components
Once your kit garden sheds arrive, carefully unpack all components. Lay out each item on a clean, flat surface, and use the inventory list provided to check that all parts are present. Sort panels, fasteners, doors, windows, and add-ons into separate groups to streamline the build.
Create a clear path from your storage area to the assembly site. Keep instruction manuals within reach at all times. Organizing components before assembly helps prevent mistakes and saves time. For kit garden sheds with many accessories or custom features, label parts with masking tape for quick identification.
Step 2: Laying the Foundation/Base
A solid, level foundation is essential for long-lasting kit garden sheds. Depending on your chosen material, you may use concrete slabs, timber bearers, or a pre-made base kit. Begin by clearing and leveling the ground, removing any debris or vegetation.
Refer to detailed guidance on garden shed base preparation to ensure proper drainage and support. Lay out your foundation materials according to the shed’s footprint, checking for level at each stage. Anchor the base securely to prevent shifting. Good preparation at this stage protects kit garden sheds from water damage and structural issues in the future.
Step 3: Assembling Walls and Frame
Start by assembling the wall panels and structural frame according to the instruction manual. Align each panel carefully, securing corners with supplied fasteners. Use a spirit level to confirm that all walls are vertical and square.
For kit garden sheds with steel or vinyl frames, connect reinforcement bars and bracing as instructed. Timber sheds may require extra bracing or diagonal supports for added stability. Take your time ensuring everything is tight and accurate, as this forms the backbone of your new shed.
Step 4: Roof, Doors, and Windows Installation
With the walls and frame in place, move on to installing the roof. Attach roof trusses or beams first, then fix panels or shingles according to your shed’s design. Secure all roofing materials tightly to keep kit garden sheds weatherproof.
Next, install doors and windows. Fit hinges and locks as specified, checking that doors open and close smoothly. For sheds with skylights or additional windows, follow instructions for proper sealing to prevent leaks. Take care to use the correct weatherproofing materials around all openings.
Step 5: Finishing Touches & Customization
Personalize your kit garden sheds with finishing touches. Add shelving, hooks, or pegboards for efficient storage. If your shed is timber, consider painting, staining, or applying a sealant to protect against moisture and UV rays.
Install gutters, vents, or security locks for added functionality and peace of mind. For kit garden sheds used as hobby spaces or offices, add insulation or decorative touches to match your style. Customizing your shed makes it both practical and visually appealing.
Troubleshooting Common Assembly Issues
Sometimes, even well-designed kit garden sheds present challenges. If panels appear warped, lay them flat in the sun to encourage straightening. For missing parts or unclear instructions, contact the manufacturer’s support line promptly.
If you encounter alignment problems, double-check the foundation and use a level to correct any issues. Access online resources or user forums for additional assembly tips. Many kit garden sheds suppliers offer video guides or customer service to help troubleshoot common obstacles.
Assembly Timeframes and Manpower
The time required to assemble kit garden sheds varies by size and material. Small sheds may take 4–6 hours with two people, while larger models could require a full weekend and extra hands.
| Shed Size | Material | Assembly Time | People Needed |
|---|---|---|---|
| Compact (4×6) | Vinyl | 4–6 hours | 2 |
| Medium (8×10) | Timber | 8–12 hours | 2–3 |
| Large (12×16) | Steel | 1–2 days | 3–4 |
Plan your build for good weather and ample daylight. With careful organization, assembling kit garden sheds becomes a manageable and satisfying project.
Customization & Usage Ideas for Kit Garden Sheds
Unlocking the full potential of kit garden sheds is all about smart customization. Whether you seek order, creativity, style, or sustainability, there are countless ways to shape your shed around your lifestyle. Explore these practical ideas to make your kit garden sheds truly your own.
Maximizing Storage & Organization
Effective organization is the foundation of functional kit garden sheds. Start by installing wall-mounted shelves, pegboards, and ceiling racks to utilize vertical space. Use labeled bins for gardening tools and hooks for hanging bikes or hoses.
Consider modular storage units that can be rearranged as your needs change. For small kit garden sheds, loft storage or stackable boxes help maximize every inch.
A sample layout for a medium-sized shed:
| Area | Solution |
|---|---|
| Wall Space | Pegboards, tool racks |
| Floor Space | Stackable bins, cabinets |
| Ceiling | Overhead loft shelf |
With a thoughtful setup, kit garden sheds become clutter-free zones where everything has its place.
Transforming Your Shed: Beyond Storage
Kit garden sheds are more than storage—they can evolve into creative spaces. Convert your shed into a home office, art studio, or cozy garden bar. Insulating the walls and adding electrical connections can make it suitable for year-round use.
Before starting a conversion, check legal considerations. For example, Living in a Shed in Ireland explores important details if you plan to spend extended time in your shed.
Real-life makeovers include hobby rooms for crafts, mini gyms, or tranquil reading nooks. Kit garden sheds offer flexibility to match your passions.
Style Upgrades & Exterior Enhancements
Personalizing the look of kit garden sheds adds charm and value. Paint or stain the exterior to complement your home and garden. Decorative cladding, window boxes, or a green roof can transform a plain shed into a focal point.
Add planters or trellises for climbing plants along the walls. Outdoor lighting and motion sensors boost security and create ambiance.
Inside, opt for stylish flooring mats, colorful wall panels, or custom hardware. Every detail helps kit garden sheds reflect your unique taste.
Eco-Friendly Adaptations
Sustainability is a growing trend in kit garden sheds. Fit a rainwater harvesting system to collect water for your garden. Solar-powered lights and fans reduce energy costs and support green living.
Use recycled materials for interior finishes, such as reclaimed wood for shelving or eco-paints for walls. Install vents or skylights for natural airflow and light, reducing reliance on electricity.
Eco-friendly adaptations not only lower your carbon footprint but also make kit garden sheds healthier and more efficient for daily use.
Maintenance, Security & Long-Term Care
Keeping kit garden sheds in excellent shape ensures they remain valuable assets for years. Regular maintenance, smart weatherproofing, strong security, and proactive care are essential for preserving both function and appearance. Whether you use your shed for storage, hobbies, or work, a consistent routine protects your investment.
Routine Cleaning and Upkeep
Routine cleaning is the backbone of care for kit garden sheds. Start by clearing leaves, dirt, and debris from the shed's roof and gutters. This prevents water buildup and reduces the risk of leaks. Wash exterior surfaces with mild soap and water, paying attention to corners where mold may develop.
Inspect the shed's interior each season. Sweep floors, check for signs of pests, and tidy up stored items. For timber kit garden sheds, look for wood rot or insect damage. Steel sheds need checks for rust spots, while vinyl options benefit from a quick wipe to remove grime.
Consistent upkeep keeps kit garden sheds looking fresh and ready for any use.
Weatherproofing and Repairs
Ireland's climate can be tough on kit garden sheds, making weatherproofing a priority. Seal any small gaps or joints with quality outdoor caulk. Timber sheds should be treated with a weather-resistant stain or paint every two to three years. Steel sheds can be protected with rust-inhibiting sprays or paints.
Address roof leaks promptly by replacing damaged shingles or panels. Tighten loose screws and hinges to prevent wind damage. If a panel is cracked or warped, replace it quickly to stop moisture from entering.
Regular repairs not only extend the lifespan of kit garden sheds but also maintain their structural integrity and appearance.
Shed Security Best Practices
Protecting the contents of kit garden sheds is vital, especially if you store tools, bikes, or valuable equipment. Start with a sturdy lock—preferably a weatherproof padlock or a deadbolt. Reinforce hinges and doors with security brackets or plates.
Consider installing a motion-sensor light or a basic alarm system near the shed. This deters intruders and adds peace of mind. For added protection, mark expensive items with a UV pen or keep an inventory list.
Check with your insurance provider to see if your kit garden sheds are covered for theft or damage. Taking these steps greatly reduces the risk of loss.
Extending Shed Lifespan
Proactive care is key to maximizing the lifespan of kit garden sheds. Schedule annual inspections to spot potential issues early, such as minor leaks or loose panels. Repaint or re-stain timber sheds when the finish begins to fade, and apply rust-proofing to metal surfaces as needed.
Keep the area around your shed clear of tall grass and debris to discourage pests. Install gutters to direct rainwater away from the foundation, reducing the risk of dampness and mold. Regular maintenance not only preserves the shed but also increases its value and functionality.
With these habits, kit garden sheds remain a reliable feature in your garden for many years.
Now that you have a solid understanding of kit garden sheds and what makes a great fit for your space, you’re ready to take the next step toward transforming your garden in 2025. Whether you’re looking for durability, style, or hassle free installation, choosing a high quality steel shed can make all the difference for years to come. If you want a reliable, eco friendly option with the added bonus of convenient delivery, explore our latest selection here: Free Delivery on your ECO Steel Garden Shed. Your ideal shed is just a click away from becoming part of your garden.
Discover more from Coola Living Ireland
Subscribe to get the latest posts sent to your email.

